Prep.Bubblescan.Net has moved to OnlineScoreTracker.com

When we moved to OnlineScoreTracker in November 2016, we asked that you please update any links so they pointed to OnlineScoreTracker.com instead of Prep.BubbleScan.net.
This week we had some issues with the forwarding and it became apparent that many of our customers are still using the old Prep.BubbleScan.net.

Please, please, use the new OnlineScoreTracker.com domain to access the Online Score Tracker.

We are sorry for any confusion this move might have caused and certainly sympathize with your frustrations experienced this week.

By |2017-01-14T17:26:23-07:00January 14th, 2017|BubbleScan, Support|Comments Off on Prep.Bubblescan.Net has moved to OnlineScoreTracker.com

How to Assign Online Tests to Students

BubbleScan allows you to assign “tests” to students that they can take through their individual student portals. You can’t actually share the test with them, but you can provide an online answer sheet that is linked to a particular answer key. When the student submits their online answer sheet it is immediately graded.

Here is how to assign a test to a student or an entire class:

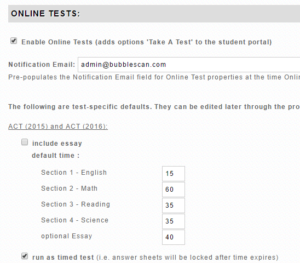
  1. First, verify that online answer sheets are enabled in your account. Go to Tools – Preferences and look for a section titled ONLINE TESTS. Make sure “Enable Online Tests” is selected.
    preferences-onlinetests
  2. If you want to change any of the default settings, this is the place and time to do it. Default settings can be changed later when you assign the actual tests.
  3. You can then assign any of the ACT, SAT, or PSAT tests that are in your KEYS library to either a student or a class.
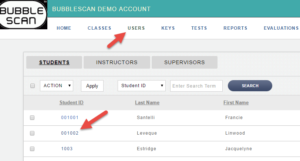
  4. To assign an online test to a student, click on USERS and select the student you want to assign the tests to.
    onlinetests01
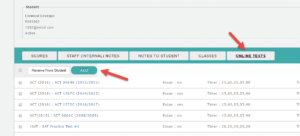
  5. Click on the Online Tests tab and then on ADD.
    onlinetests02
  6. Select all the tests you want to add to the student and then click SAVE.
  7. To remove tests from the student’s account, select the tests listed and then click on “Remove From Student”.
  8. To edit test settings (include/exclude essay, change times, lock the test after time expires) click on the test name, make the changes and the SAVE.
  9. To assign a test to a class, click on CLASSES and select the class you want to assign the tests to. Everything else works the same way as described above.
    onlinetests03
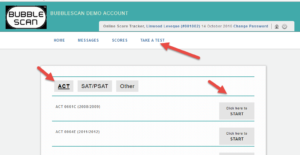
  10. A student will now be able to log into their student panel, click on the menu option ‘Take A Test’, select the test you have assigned to them and enter his/her responses one section at a time. The sections are graded immediately as soon as the student submits his/her answers.
    onlinetests04
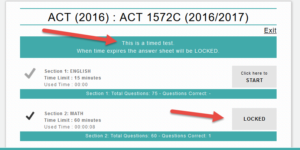
  11. It is possible to take sections on different days and complete an entire test over time. Unless the test was set up as ‘timed’ students can even go back and edit answers as long as the complete test hasn’t been submitted. As the student submits additional sections for grading, those sections are added to the original test (i.e. under the initial test date). Once a complete test has been submitted that test becomes available to be taken again.
    onlinetests05
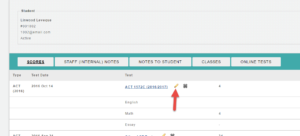
  12. If you enabled it and the student enters an essay through their Student Portal, you (or an instructor) can later view this essay online, leave comments and grades. This is available through the EDIT TEST screen. You can locate a student’s test through the TEST MENU or through the USERS menu. Click on the edit pencil next to the student’s test.onlinetests06
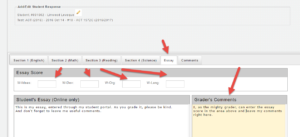
  13. Then click on ESSAY, read the student’s essay, make comments in the section called ‘Grader’s Comments’ and enter the essay scores.
    onlinetests07
By |2017-03-17T12:31:53-06:00October 14th, 2016|BubbleScan, Support|Comments Off on How to Assign Online Tests to Students
Go to Top