Creating Local Answer Keys

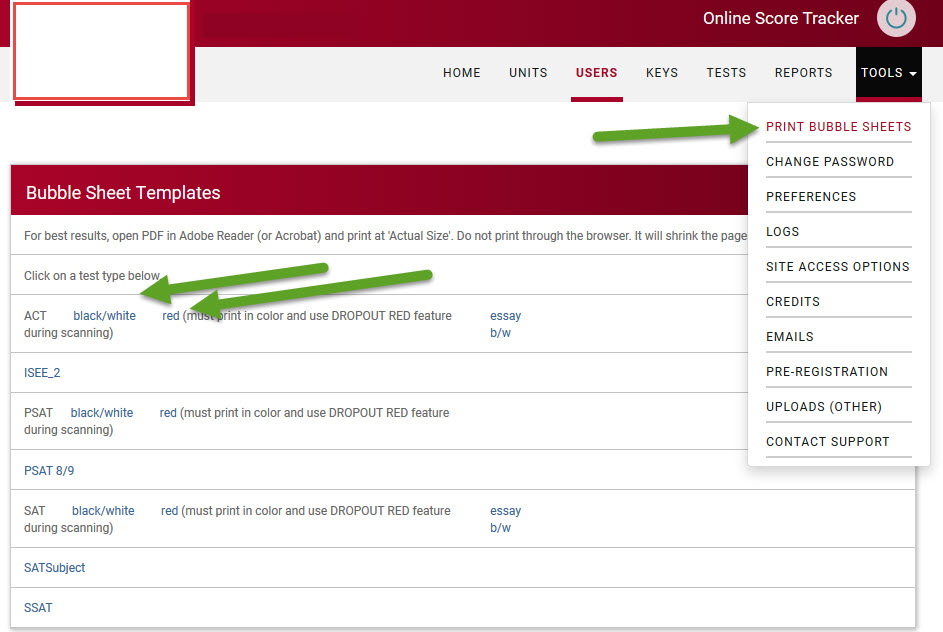
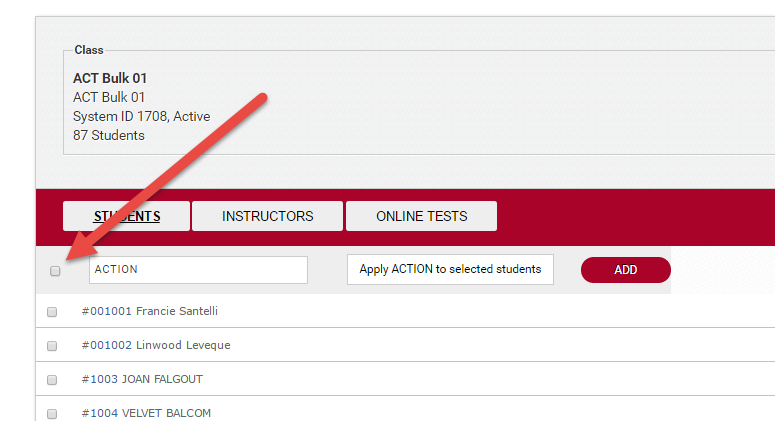
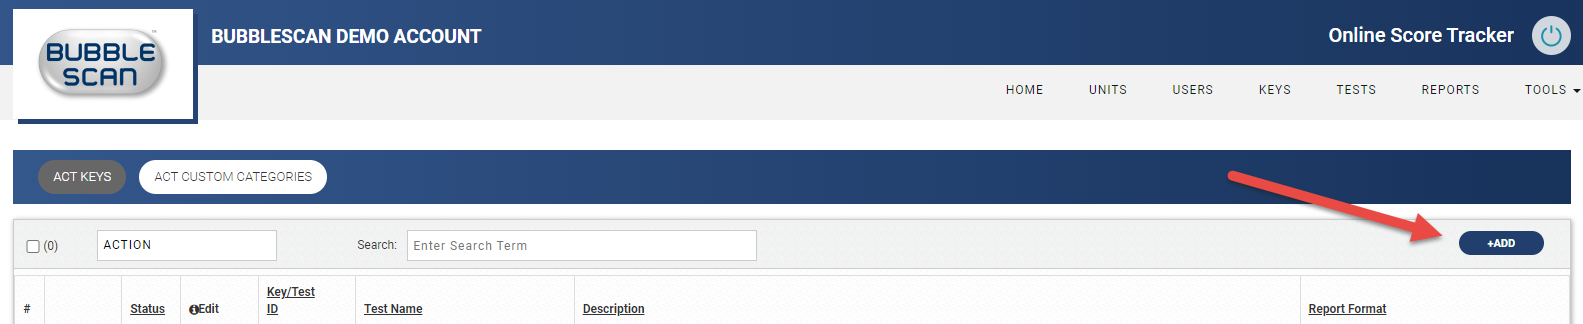
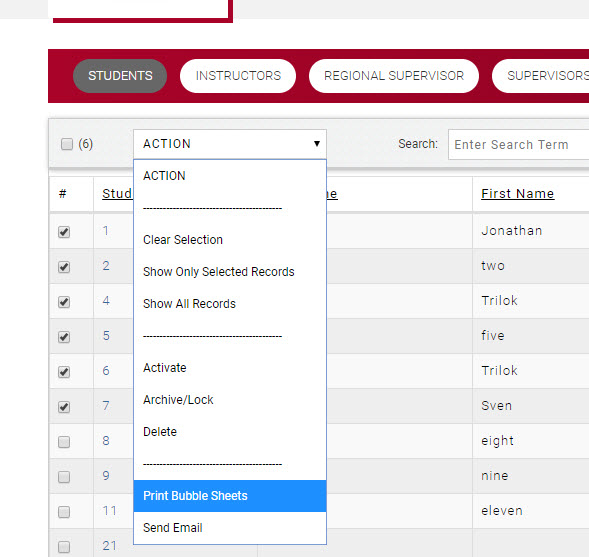
You currently have three options when it comes to creating your own answer key. It all starts with clicking on <+ADD> in the KEYS menu of the particular test type you want to add to.

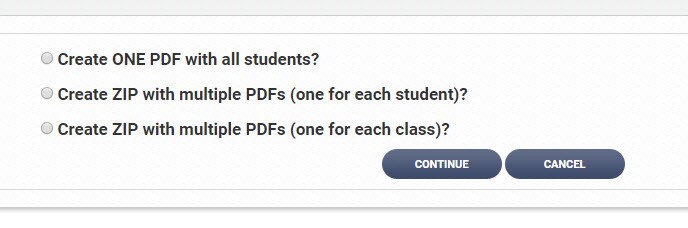
You then see the three options for creating a new key.

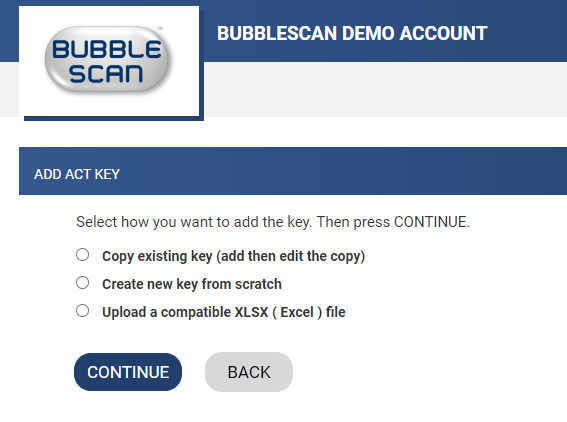
We will very soon be adding a fourth option for ACT, the ADD ACT KEY WIZARD, but I will create a separate post for that when it is actually available.

The easiest and recommended way to create a new key, is the first option, Copy existing key (and then edit the copy).  You will see a list of all active and inactive, local and system keys and simply pick the one you want to copy.

When assigning a new key ID, you have to pick one that does not belong to an ACTIVE key. For that reason it makes sense to deactivate system key #1 before you want to create your local copy using the same key ID.

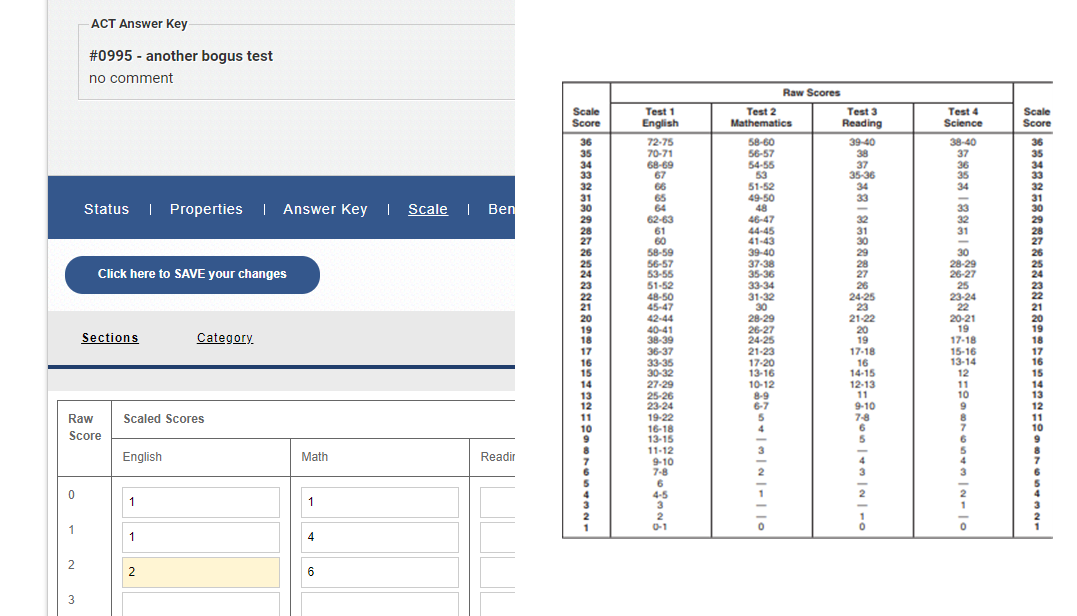
The second option is to create the key from scratch right through OnlineScoreTracker. The process is pretty straight forward, just tedious. It can get a little confusing when it comes to entering the scaled published by the test maker. OnlineScoreTracker’s format differs from the format you may see published by the test maker. We show the Raw Score on the far left and ask you to enter the Scale Score obtained, while the published scale usually does it just the other way around.

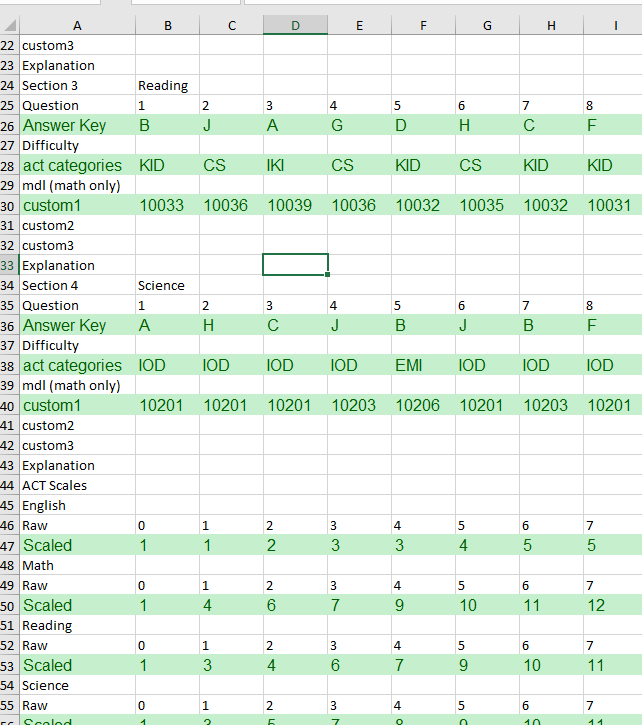
If you are good with Excel, then the third option to upload a compatible Excel file might be for you. We usually start by downloading an existing Excel file and then modifying it by replacing the key, categories, and scale. When using the Excel file, it is critical that fields remain exactly where they are and that you use the correct abbreviations for categories, hence the practice of modifying an existing Excel key.

By |2022-07-27T08:21:06-06:00July 27th, 2022|OnlineScoreTracker, Support, Tutorial|Comments Off on Creating Local Answer Keys

Copyright Violation – Removing ACT Keys

July  13, 2022:

We received an email today from Incopro, who are acting in behalf of ACT, threatening legal action against us if we do not remove all copyrighted material from this website.

We are a small business, just barely profitable and standing up to ACT is out of the question.

To comply with their request, we are taking a step back and reverting to the way we did things when we got started. We provide test grading and reporting framework. You provide the tests and answer keys.

Specifically, we will be disabling all ACT SYSTEM KEYS on our websites by August 1, 2022, which allow us to make these adjustments within the 21 day window they provide us. This means after August 1, 2022 you will not be able to use system keys for grading or as a template for your own local keys. All grading of ACT tests will be done using your own local keys.

Any existing reports based on ACT system keys will still be available. None of that data will be removed or affected.

We believe this should not impact your continued business with us. Please contact me (Joerg Weser) if you have any questions.

By |2022-07-14T11:18:55-06:00July 13th, 2022|BubbleScan, Support|Comments Off on Copyright Violation – Removing ACT Keys

Get Students to Set Their Own Password

Get Students to Set Their Own Password

You are about to create student profiles in your OnlineScoreTracker account and you know you want your students to access their Student Portal so they can take online tests and view their scores online.

We think a slick way to communicate the necessary information to the students is to use a keyword of “verify” in the password field when you create the student profile and a customized “Set Password” email template. Our system will automatically send a personalized email to every new student along with the login details and a link to set their password. Here is how this works in detail:

1. Review and if necessary modify the email template “Set Password” – or create your own. This is the email that gets sent to the student.  To review and edit this template go to Tools – Email – Templates, then click on the Edit pencil associated with the template “Set Password”:

You can change the title of the email and any of the text. Here is what it says by default (at least at the time this post was written):

Email Title:

Welcome - please set your password

Email Message:

Dear {{firstname}}, We have set up your own Student Portal.The Student Portal allows you to:
1. see and print all your score reports,
2. read messages we may leave you from time to time, and
3. fill out online answer sheets for practice tests or home work assignments you may be taking at home.

To set your personal password, please click here:
{{set_password_url}}
You can then log in at any time by visiting:
{{url}}
and providing your username:
{{username}}
and your personal password.

We look forward to working with you to prepare you for the ACT/SAT.

Your team at {{account}}

The special codes in {{ }} are filled in by OnlineScoreTracker. Here is what the email looks like that is based on the above template.

2. With your email template in place, you now want to tell our system that it should use this email template when the automatic email is sent. To do this click on Tools – Preferences and locate the section on “Creating Student Accounts” and then choose the email template for “Email Template when password = Verify”:

3. When you now add the student profile to your OnlineScoreTracker account all you need to do is specify a password of “verify”. There are three ways (manual, csv, API) for you to add student profiles and the “verify” password works the same for all three methods.

By |2020-06-03T14:25:04-06:00June 3rd, 2020|BubbleScan, Support, Tutorial|Comments Off on Get Students to Set Their Own Password

New Single Page PSAT Bubble Sheet

March 12, 2020:

Today we updated our OnlineScoreTracker grading system to use the new single-page PSAT bubble sheet.

As a customer you can access this new form in two ways:

1. Preprint Bubble Sheets

2. Blank Bubble Sheets

  1.  Preprint Bubble Sheets:

    1. Select a UNIT (group, class, program, site, region) or one or more students (either from the UNIT menu or from the USERS-STUDENTS) menu.
    2. Select PRINT BUBBLE SHEETS from the ACTION dropdown button.
    3. If you’ve selected one or more UNITS (in the example below, I selected multiple classes) you will get an additional screen with some printing options:
    4. You will then be asked to select the test type (you want PSAT) and then the answer key.
    5. Eventually you get to the screen where you can specify the test date and choose to print the b/w bubble sheet (default) or the red version of the bubble sheet. If you select the red version please make sure to PRINT in color and to later SCAN with DROP OUT RED enabled. You will not be happy with the results if you do not follow these instructions!!
    6.  We still recommend that you print the forms at 100% to ensure reliable reading of the marks later. In your desktop version of Adobe Reader (or Acrobat) this setting is called “Actual Size”.
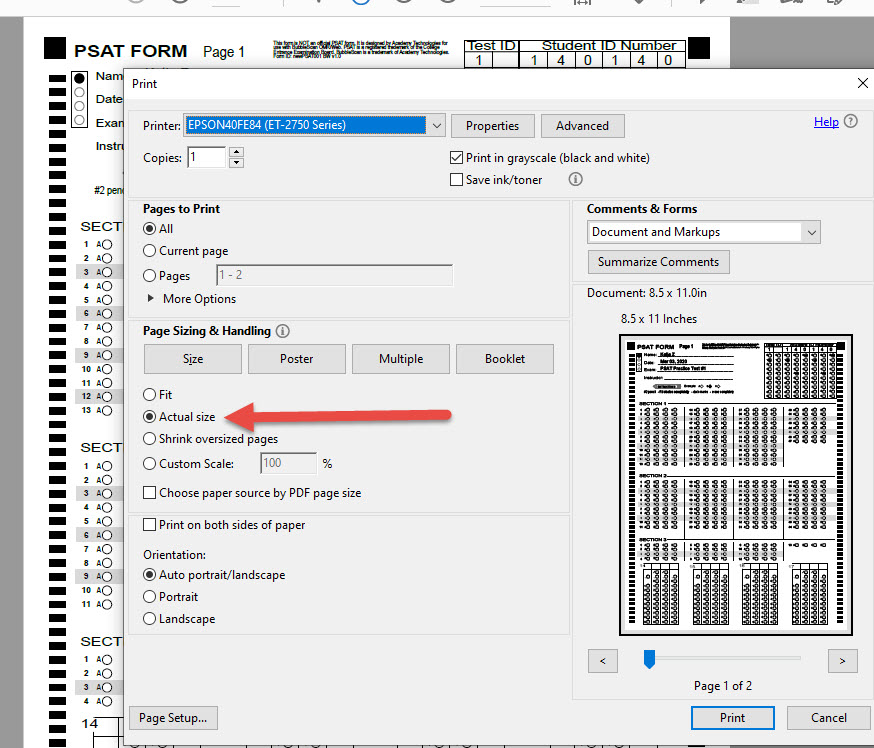
      Recently, we’ve noticed that Chrome now offers the option to not shrink the printed page. The new setting is found under More Settings – and is called Scale: Custom with a value of 100.
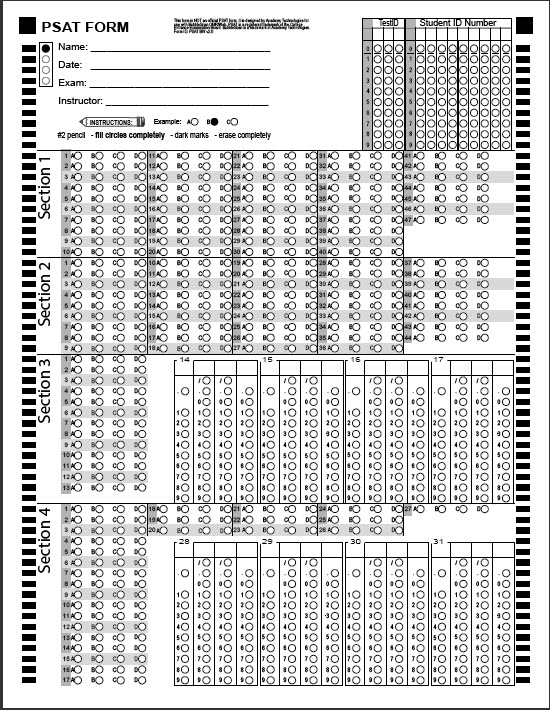
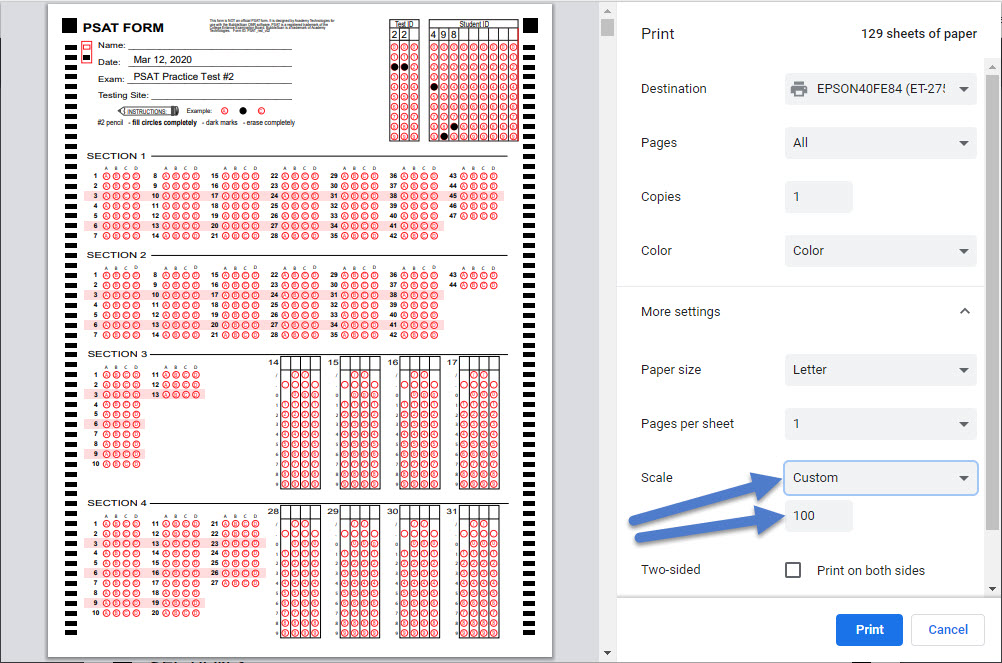
      A good way to check if your form is printing at 100% is to look at the black alignment squares at the top. The squares are 1/4″ x 1/4″ and should be about 1/4″ from the top and either side of the printed page. It doesn’t have to be exact, but if one of the squares touches the edge of the paper, or is cut off, or is 1/2 inch or more from the edge of the paper, proper reading by our system can be compromised.
  2.  Blank Bubble Sheets:

    The other place to access and print blank bubble sheets is through TOOLS – PRINT BUBBLE SHEETS. Just click on any of the links.

If you have any questions or comments, as always, we’d love to hear from you.

Also, if you see test types in any of these screen shots that you would like to use in your account, we’ll gladly enable them for you.

By |2020-03-12T09:58:12-06:00March 12th, 2020|BubbleScan, Support|Comments Off on New Single Page PSAT Bubble Sheet

New PSAT bubblesheet

We are updating the PSAT form very soon.

Currently we are using a 2-page form, the new form is more compact and is a 1-page form.

If you have any concerns about our abandoning the 2-page form, please contact us right away.

When we switch to the single page form (most likely the first part of next week), the old 2-page forms will no longer be recognized by the OnlineScoreTracker.

When you pre-print bubble sheets with student data, we will be printing on the new 1-page PSAT form.

If you have concerns, please reach out now, otherwise, enjoy the convenience of the single page PSAT form.

Thanks for being great customers.

new PSAT bubblesheet
By |2020-03-05T17:47:18-07:00March 5th, 2020|BubbleScan, Support|Comments Off on New PSAT bubblesheet

SAT #10

Thanks to one of our customers we were finally able to get our hands on the scales for CollegeBoard’s Practice Test #10 from The Official SAT Study Guide 2020 Edition (ISBN 978-1-4573-1219-9). This answer key is listed as test/key ID #10 in our system. It is the same test as the retired test 5OSA03 from Oct 2018.

We have mapped the answers to our category list and student reports generated using our key will show the question category analysis.

As always you need to activate the key in your account before you can use it.

And you are welcome to use our key as a basis for your own custom category mapping.

By |2019-07-23T09:43:40-06:00July 23rd, 2019|BubbleScan, Support|Comments Off on SAT #10

Dropbox Integration

Connecting your OnlineScoreTracker account with your Dropbox folder requires 2 steps:

1. Create an “App” in your Dropbox account.

2. Configure your OnlineScoreTracker account.

1. Create an APP in your Dropbox account

1. Go to  https://dropbox.com/developers.

2. Log into your Dropbox account.

3. Click on “APP CONSOLE”.

4. Click on “Create App”.

5. Select “Dropbox API”.

6. Select “App Folder”.

7. Enter a UNIQUE folder name. We recommend “OnlineScoreTracker_company prefix“.

8. Click on “Create App”.

1. Configure your OnlineScoreTracker account

This creates your Dropbox app and takes you to the app parameters.

Before we generate and retrieve the parameters we need to properly configure your OnlineScoreTracker account, log into your OnlineScoreTracker account (as ADMIN!), go to Tools – Preferences – Third Party Connections. Now copy the necessary parameters from your Dropbox app into the corresponding OnlineScoreTracker fields:

9. Copy and paste the “App key”.

10. “Show” and then copy and paste the “App secret”.

11. “Generate” and then copy and paste the “Generated access token”.

Your Dropbox folder will be in a directory called ‘Apps’ within your Dropbox account.

A word about security:

If you feel the security has been compromised, simply generate and copy/paste a new access token.

By |2019-05-07T11:45:16-06:00May 7th, 2019|BubbleScan, Support|Comments Off on Dropbox Integration

Pre-Print Bubblesheets

You asked for it, you got it.

You can now pre-print bubblesheets with a student’s name, date, test name, and bubbled-in TestID and StudentID.


To accomplish this select one or more students either from the list of students accessed through the CLASSES menu or through the USERS menu. Then select the ACTION “Print Bubblesheets”,


specify a test date and whether or not you want to include additional ESSAY pages.


We will create a PDF like this:

click on image to view sample PDF

When printing, please remember to print using Adobe Reader or Acrobat and specifying ‘ACTUAL SIZE’. We’ve gotten pretty good at reading shrunken pages, but you’ll get the best OMR reading experience when you start with bubblesheets that are printed at 100%.

And in case you are wondering, no, we don’t actually process the ESSAY pages (yet).  We do have some ideas, but they are only ideas at the moment, not active development projects.

By |2017-06-27T10:08:02-06:00June 27th, 2017|BubbleScan, Support|Comments Off on Pre-Print Bubblesheets

New Reports for 2017

We have updated, more colorful reports available for you to use.

Our new ACT report looks more like the official ACT report. And our new SAT report, well, it just looks nicer than the one we had before. Judge for yourself:

You can easily select to use these reports through TOOLS-PREFERENCES.

Simply select the 2017 version of the reports and click SAVE.

If for some reason you prefer to switch back at any time, not a problem. Just select the 2016 version of the reports again.

By |2017-06-27T09:43:04-06:00June 27th, 2017|BubbleScan, Support|Comments Off on New Reports for 2017

Select ALL Students in Class

It’s now easier to deactivate or delete all the students in a class.

When selecting the ‘select All’ checkbox at the top of the displayed list of students belonging to a class, ALL students in the class are selected, not just the ones displayed on the page.

By |2017-03-17T12:31:53-06:00January 28th, 2017|BubbleScan, Support|Comments Off on Select ALL Students in Class
Go to Top