OnlineScoreTracker supports four ways to create new student accounts. This tutorial will address all four and also point out some ‘advanced’ features.
Manual
The easiest way to create a single student profile is to do it manually.
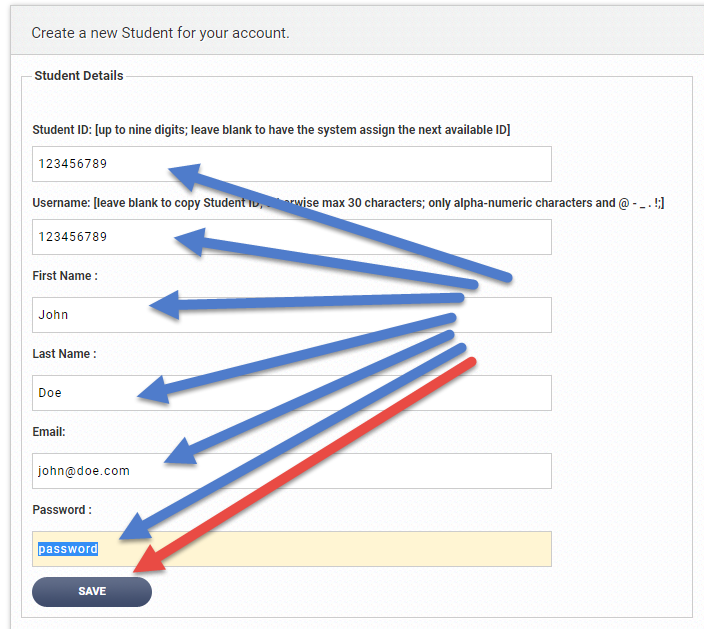
Click on USERS in the menu bar. The screen defaults to your list of STUDENTS. Click on +ADD.

Then fill out the fields and click SAVE.

Advanced Tips:
If you leave the Student ID field BLANK, OnlineScoreTracker will assign the first available ID starting with the value you set through Tools-Preferences-Creating Student Accounts:

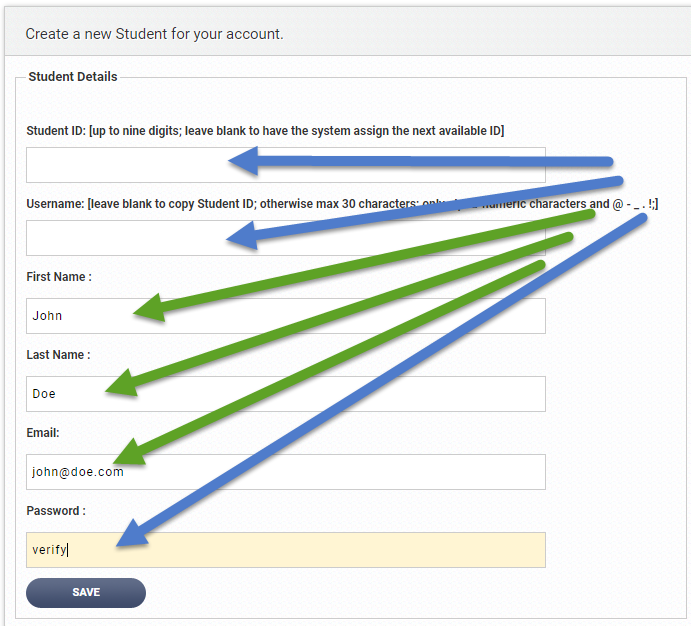
If you leave the Username field BLANK, OnlineScoreTracker will use the Student ID as the Username. A student can log into their student portal using either the Student ID or the Username. When you grade paper&pencil based tests, the bubble sheet must contain the numeric Student ID.
If you specify a password of “verify”, OnlineScoreTracker will send an email to the student asking them set a password. Click here to read more about this process.
This means that the simplest, and from our point-of-view recommended way to create a new student profile is this:

CSV File
The best way to create a multiple student profiles is to by uploading a csv (=comma separated values) file created through Excel or another program.
Click on USERS in the menu bar. The screen defaults to your list of STUDENTS. Click on +ADD.

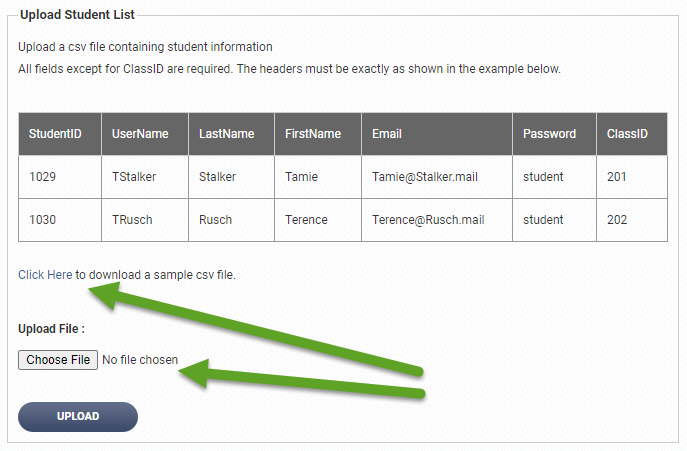
On the right you will see information about the formatting, a place to upload your csv file and, very useful, a link to a sample csv file.We encourage you to download that file so you can use it as a temple. The spelling of the headers has to be PERFECT, no accidental spaces, incorrect cases or typos!

Advanced Tips:
Advanced Tips:
If you enter “auto” into the Student ID field, OnlineScoreTracker will assign the first available ID starting with the value you set through Tools-Preferences-Creating Student Accounts:

—
If you enter “auto” into the Username field, OnlineScoreTracker will use the Student ID as the Username. A student can log into their student portal using either the Student ID or the Username. When you grade paper&pencil based tests, the bubble sheet must contain the numeric Student ID.
—
If you specify a password of “verify”, OnlineScoreTracker will send an email to the student asking them set a password. Click here to read more about this process.
—
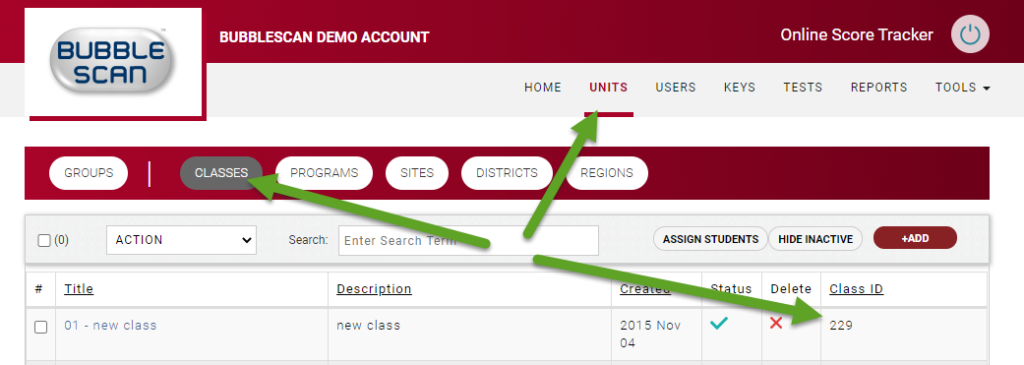
If you are organizing your students into classes, you can also include the class ID in the csv file. This will automatically place the new students into the respective class.

This means that the simplest, and from our point-of-view recommended format of a csv file looks like this:

—
If you want to update students that are already in your database, you can also use the csv file to do this. For more on this advanced option, read a future article on “Updating student profiles through csv”.
API
If you already have a your own website where you manage student profiles, you will probably want to create a process for your website to automatically create student profiles in OnlineScoreTracker.com. Information on how to do this is shown under Tools-Preferences in the section called “Creating Student Accounts” under “Automatic Creation of Student Accounts”. It involves a POST from your website to ours. More about this in a future article about “Connecting to OnlineScoreTracker via API”.
Self-Registration
An increasing number of our customers are making use of our self-registration option. By following a link on your website students can create their own profile within your OnlineScoreTracker account. If you want they can also be directly assigned to a class with one or more practice tests assigned to them.
More about this feature in a future article about “Creating Student Accounts through Student Self-Registration”.
